Did you decide to dockerize your application? Awesome! Are you looking for a place to build and host your Docker containers? OpenShift Online is a service that allows you to build and run your Docker containers. Read on, if you want to learn more about it.
OpenShift Online is a Platform-as-a-Service cloud managed by Red Hat. It is hosted on Amazon Web Services (AWS). OpenShift Online is a multi-tenant offering. That means that containers owned by different tenants are running on the same cluster. If you’re more interested in renting your own private OpenShift cluster, you shall consider the OpenShift Dedicated offering, instead.
The information about the plans and pricing of the OpenShift Online service can be found here. In this blog post, we’re going to utilize the free of charge Starter plan. With this plan, you get 1GiB of memory for your containers, another 1GiB of memory for running builds, deployments and jobs, and finally 1GiB of persistent storage. The real limitation of the free Starter plan is the resource hibernation. Your containers will be forced to sleep 18 hours in a 72 hour period.
Welcome to OpenShift Online
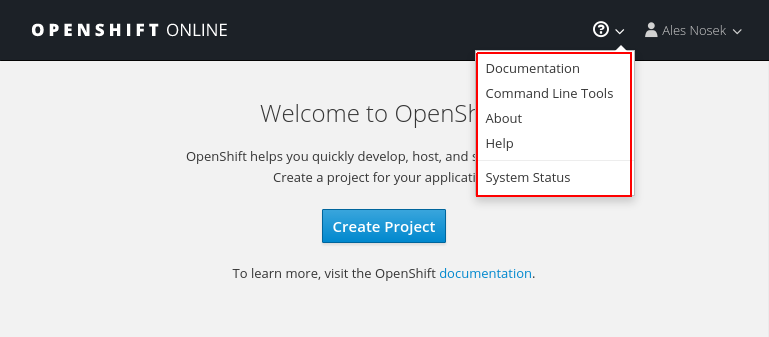
You can login into OpenShift Online here. If you don’t have an OpenShift account, the sign up and creation of the OpenShift account doesn’t take you long. After you login into your OpenShift account, find a small question mark icon in the top right corner of the welcome page. From the drop down menu choose the “Command Line Tools” option.
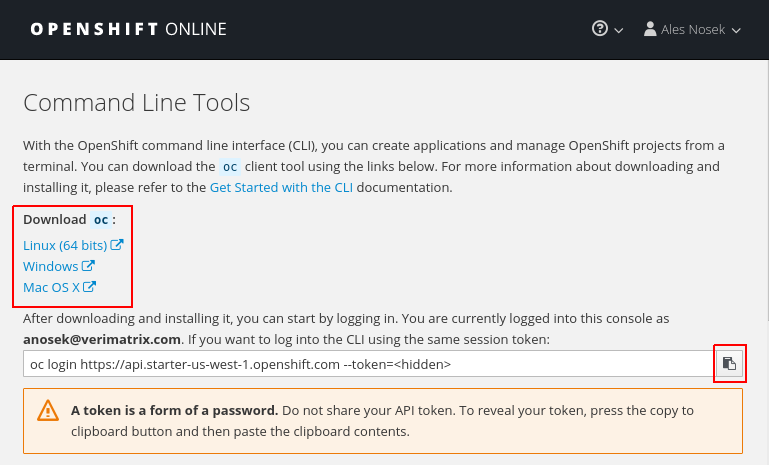
Download the oc client tool using one of the provided download links. We’re going to use the oc tool throughout this tutorial. After downloading the distribution archive, extract the oc tool from it and place it somewhere on your PATH. The oc tool is a single statically linked binary which makes the installation straight forward. On the same page, notice the instructions on how to login into the CLI. We’ll be logging into it in a moment.
Go back to the welcome page and this time choose the “About” option from the drop down menu in the top right corner. On the “About” page, you can learn that OpenShift Online is built upon a fairly recent version of OpenShift. That’s great to know, as each new version of OpenShift comes with a ton of new features. As the OpenShift Online user you would not like to be left behind with an older version of OpenShift.
On the same “About” page, you can find the address of the integrated Docker registry. You can push ready images to this registry in order to make them available for deployment on OpenShift. If you build images on OpenShift, the finished images will be pushed into this registry at the end of the build process. In addition to deploying images from the integrated Docker registry, you can, of course, deploy images directly from the Docker Hub as well.

Getting our hands dirty
In this section, we’re going to use the CLI tool to exercise the OpenShift Online functionality. From the “Command Line Tools” page that we visited previously, copy the command to login into the CLI tool:
| |
Note that the value of your login token will differ. Next, let’s create a new OpenShift project called php-hello:
| |
The Starter plan allows you to create only a single project. Next, we’re going to build our PHP application. The source code of the application can be found at
GitHub. The whole purpose of the application is to return a Hello message containing the name of the host that the application is running on. You can build the application using the oc new-build command:
| |
OpenShift automatically detects, that we’re building a PHP application and will use an appropriate build image. The build image contains a pre-installed Apache server with mod_php. During the build, the index.php file from the source code repository is copied into the document root of the Apache server. The build process takes a minute or two to complete. You can follow the progress of your build using the oc logs command:
| |
The output of the build is a new openshift-php-hello Docker image. This image is automatically pushed into the integrated Docker registry by OpenShift. In the next step, we’re going to create a DeploymentConfig file which describes how to deploy our brand new openshift-php-hello image on OpenShift. Create a file named php-hello.yml with the following content:
| |
Submit this file to OpenShift in order to launch the deployment:
| |
Based on the DeploymentConfig descriptor, OpenShift will start one container php-hello-1-XXXXX. You can check whether the container is running with:
| |
Verify that the READY column for your php-hello container eventually reads 1/1. This indicates, that the deployment was successful and your container is running. In the following steps, we’re going to configure OpenShift routing to allow the external network traffic to reach our container. For further information about the traffic routing on OpenShift, you can refer to my older blog post
Accessing Kubernetes Pods from Outside of the Cluster. First, let’s create a service for our php-hello container:
| |
The created service functions as a internal load balancer. It forwards the traffic to the php-hello container on port 8080. The internal IP address of this load balancer is 172.30.80.50, as we can learn when listing the existing services:
| |
Finally, we’re going to create a route which will forward the external traffic to our service and hence to our php-hello container:
| |
The route is assigned a public FQDN php-hello-php-hello.a3c1.starter-us-west-1.openshiftapps.com. As we haven’t configured the route to use the TLS protocol, our application will be reachable on the standard HTTP port 80. The assigned FQDN can be found in the output of the oc get route command:
| |
At this moment, our application should be reachable over the public Internet. Let’s send an HTTP request to our application:
| |
Excellent, the application responded with the Hello message as expected. In the last exercise of our tutorial, we’re going to scale our application. Let’s ask OpenShift to create one more php-hello container:
| |
The deployment of the second container will complete shortly. You can check the status of running containers using the oc get pod commmand:
| |
At this point, we’re having two Docker containers ready to serve our HTTP requests. Let’s generate some traffic and observe how OpenShift load balances the incoming requests between the two containers:
| |
Conclusion
OpenShift is a feature-rich container platform. In this blog post, we were only able to scratch the surface.
Are you considering to host your containerized application on OpenShift? Or are you already running your production apps on OpenShift? I would like to hear your experiences, please, leave your comments below.